Feeds:
Posts
Comments

Posts Tagged ‘baking’

I wonder if these Advent posts will all end up being about food? Today was Cake and Chat day – most Thursday mornings since we’ve been here in the parish (more than thirteen years now!). We started in the church hall, then migrated into the church when Open Church began pre Covid – we were open four mornings a week then. Then we were on Zoom in lockdown and then in the Vicarage back yard, into the red room (our front room, with a red painted wall) and now back into church since the revival of Open Church.

We’ve restarted Open Church slightly differently – with a session on Wednesday afternoons so that families returning from our church school can come in, and another in the traditional Cake and Chat slot on Thursday mornings. This means that, with our small groups meeting centrally at church on Wednesday evenings, our church heating is minimised with maximum mid week building use. And we’re finding that both Open Church sessions are growing as word gets out. Yesterday we had about 40 people in the building – long standing church members in to catch up and help welcome, and several families in with their kids to play and connect. I had to delve behind the table we use for communion for the Duplo set we have stashed there, and we set up two extra large tables for crafts and games.

And today the Cake and Chat team were all there and several extras turned up – including a dad and his daughter who’ve recently moved into the area and are waiting for a nursery place and had already joined us on Wednesday afternoon, and a lady from the same hometown in Jamaica as a church member who was also there.

Anyway, everyone in church this morning loved the apricot and pecan biscotti I made in a vaguely festive baking session yesterday. There was also an orange and choc chip ring cake, but the biscotti were the winners. I’ve made these a few times – my recipe card is really tattered, but this time I used Italian 00 flour and I think the extra strength in the dough made them work particularly well. This recipe allows you to improvise the filling from whatever you have in your baking cupboard.

Ingredients

  • 1 egg
  • 100g caster sugar
  • 125g plain flour (00 is best) – or 100g flour and 25 cocoa
  • 1/2 tspn baking powder
  • 1/4 tspn salt (flakes are great)
  • Filling options: 50g almonds/pecans/walnuts and 75g dark chocolate chips/chopped apricots – or try your own combination of nuts, cranberries, raisins, chocolate, mixed spice, lemon, rosemary – if you find a good combo do put it in the comments!

Put the oven on to 180C. Whisk the egg and sugar until thick and pale. Then fold in the flour, baking powder and salt, followed by the filling. Shape on baking paper or a silicone mat (on a metal tray) into a small loaf 5cm wide x 25cm long.

Bake for 25 minutes and then remove and cool for 5 minutes before slicing on the diagonal into slices that are about 1cm thick. Lay the slices on the tray with cut faces up and cook for a further 10 minutes. Turn the biscotti (‘twice cooked’) over and cook for a further 5 minutes. Mine were still quite pale yesterday, so I left them to cool in the oven when I switched it off and they were perfect – with a crunch that softened just nicely when dunked into coffee but not so crunchy that you worried about your fillings when taking a bite.

Read Full Post »

Ages ago, when I was slightly more on top of life, I went through a phase of baking sourdough. I love the taste of the bread, and it keeps brilliantly. And if we’re all going to stuck at home for a bit, I think the relaxing rhythm of the baking would be good for us all. And a friend has just asked online for sourdough recipes, and I discovered most of this post lurking in my vast drafts folder.

There are loads of sourdough recipes online. So when I first had a go, I cobbled one together from the internet and a packet of bread flour, because I’d not yet bought a book. It works just fine. It looks long, but it’s actually pretty simple: make the starter over the course of a week, knead over a morning, an afternoon or an evening, prove overnight, bake in about half an hour.

I made my sourdough starter from the recipe on the flour packet, which was as follows:

Day 1: 75g flour, 75ml water. Stir to thick paste. Leave in jar with about 1l capacity in a warm place. The Vicarage kitchen was fine, so it doesn’t have to be super warm.

Day 2: Add the same again.

Day 3: And again. The mix was starting to bubble a bit and smell a bit yoghurty.

Day 4: And again. By now I’d realised that 75g flour is about 125ml, so I started using a heaped 1/2cup measure for the flour. This isn’t baking, so an exact measurement isn’t that important.

Day 5: And again.

Day 6: And again.

Day 7: And again. This is then enough to start making the sourdough. The starter was bubbling nicely by now and smelling full of lactobacillus. It tastes quite sour. Unsurprisingly.

So then I started with the bread itself. And all you need to add to the starter is flour, warmish water and salt. My recipe is a slow kneading one, which can be done over a few hours, but is pretty flexible if you’re in and out of the house. It can also be done in an evening though if you’re out all day. There are heaps of other techniques all over the internet. Basically, you’ve got some yeast in the starter, so you can make bread with it somehow. The yeast works better if worked slowly but I’ve made pizzas using a dough that’s only had a few kneads over an hour or two.

Ingredients

  • 200ml sourdough starter (original recipe said 150-250g but you need to scoop it out anyway and this is over 150g)
  • 500g bread flour (any sort)
  • 1 tspn salt
  • Around 350ml water (for the example loaf pictured here I used about 1/3 strong brown flour to 2/3 strong white and about 400ml water – the starter was quite stiff)

The key thing about sourdough is that you make quite a wet dough compared to the dough you’d make using instant yeast. I started first with strong white flour and exactly 350ml water. Trying it this way gives you a feel for the sogginess of the dough, but I don’t bother measuring now. You need more water if you’re using brown flour, or a mix. The recipe is very flexible. If your dough is super wet you’ll get a flat loaf with quite an airy texture. A drier dough gives me a denser loaf which holds its shape better. All delicious though.

I mix my dough in a pyrex bowl, using a silicone spatula. Then I leave it, covered with a cloth for ten minutes. No kneading. And then I do a series of kneadings and leavings as follows:

Mix dough, leave 10 minutes, in your bowl, covered with a clean teatowel or a muslin cloth, if you have some lurking.

Knead by folding over about 15-20 times. It will be sticky, so oil your kneading surface, and the inside of the bowl before placing it back, then leave it for another 10 minutes, covered. I have a plastic scraper that I use to gather everything back together and avoid lots of dough getting left on my board.

Knead 15-20 times on oiled board, leave 10 minutes in oiled bowl, covered. You really need the oil.

Then repeat again 4 times, leaving your dough for:

30 minutes

1 hour

1 hour again

1-2 hours NB All these times are pretty flexible, and you can probably get away with missing one or two of the kneads out.

Finally knead 15-20 times and leave the dough to rest on your board, covered with the cloth. Whilst that is happening, wash and dry your bowl. When your ten minutes are up, take your cloth, cover it liberally in bread flour and place it in the bowl, where it will serve to shape your bread in its final prove. Then fold the dough into a vague round shape, using lots of flour and pop it in the bowl (which should be about the same size as the dough, with a bit of room for rising), scatter over some more flour and then pop another cloth or some other cover on (I have a silicone cover that is super useful for this sort of thing).

If you don’t use enough flour, it will stick to the cloth, which can be quite a stressful experience as you try to extract it onto a very hot baking sheet. So ladle on the flour. This is how I did it for my first few loaves. Then I had a birthday and a banneton for a present (a 1kg banneton is perfect for this recipe) which is a bit easier – you just flour the banneton and top it with a cloth. The cloth and bowl combo worked fine though. My bowl has a capacity of about 2l.

Then pop your bowl or banneton in the fridge and leave it overnight, or a couple of nights. It will rise very beautifully.

Then, when you are wanting to make your bread, pop a baking sheet in the oven and whack the temperature up to the highest it will go. This is about 250C on my oven (I think – it’s past 240C anyhow). Also place handy a sharp carving knife or similar, a small deep baking tray eg a cake tin, with a glassful of water in it and some polenta or more bread flour. Retrieve your now risen loaf from the fridge.

Once the oven is hot, take the baking sheet out and put it on a slip proof, heat proof surface (I use the top of the cooker). Sprinkle the tray with polenta or flour and then invert your bowl or banneton on the sheet. It will start to spread out. Cut a deep cross in it, about half way through the dough. Then pop it in the oven, followed by your water filled tin on a shelf below.

Cook for 15 minutes at your top temperature and then turn the oven down to 200C for 20 minutes. And then take out of the oven, cool and eat warm with butter. If there’s any left it is delicious in any way and especially makes the world’s best toast.

I have to go now and resurrect my starter. See you back here in a week with a loaf?

IMG-20130917-00180 (1)

One I made a *lot* earlier than this blogpost

Read Full Post »

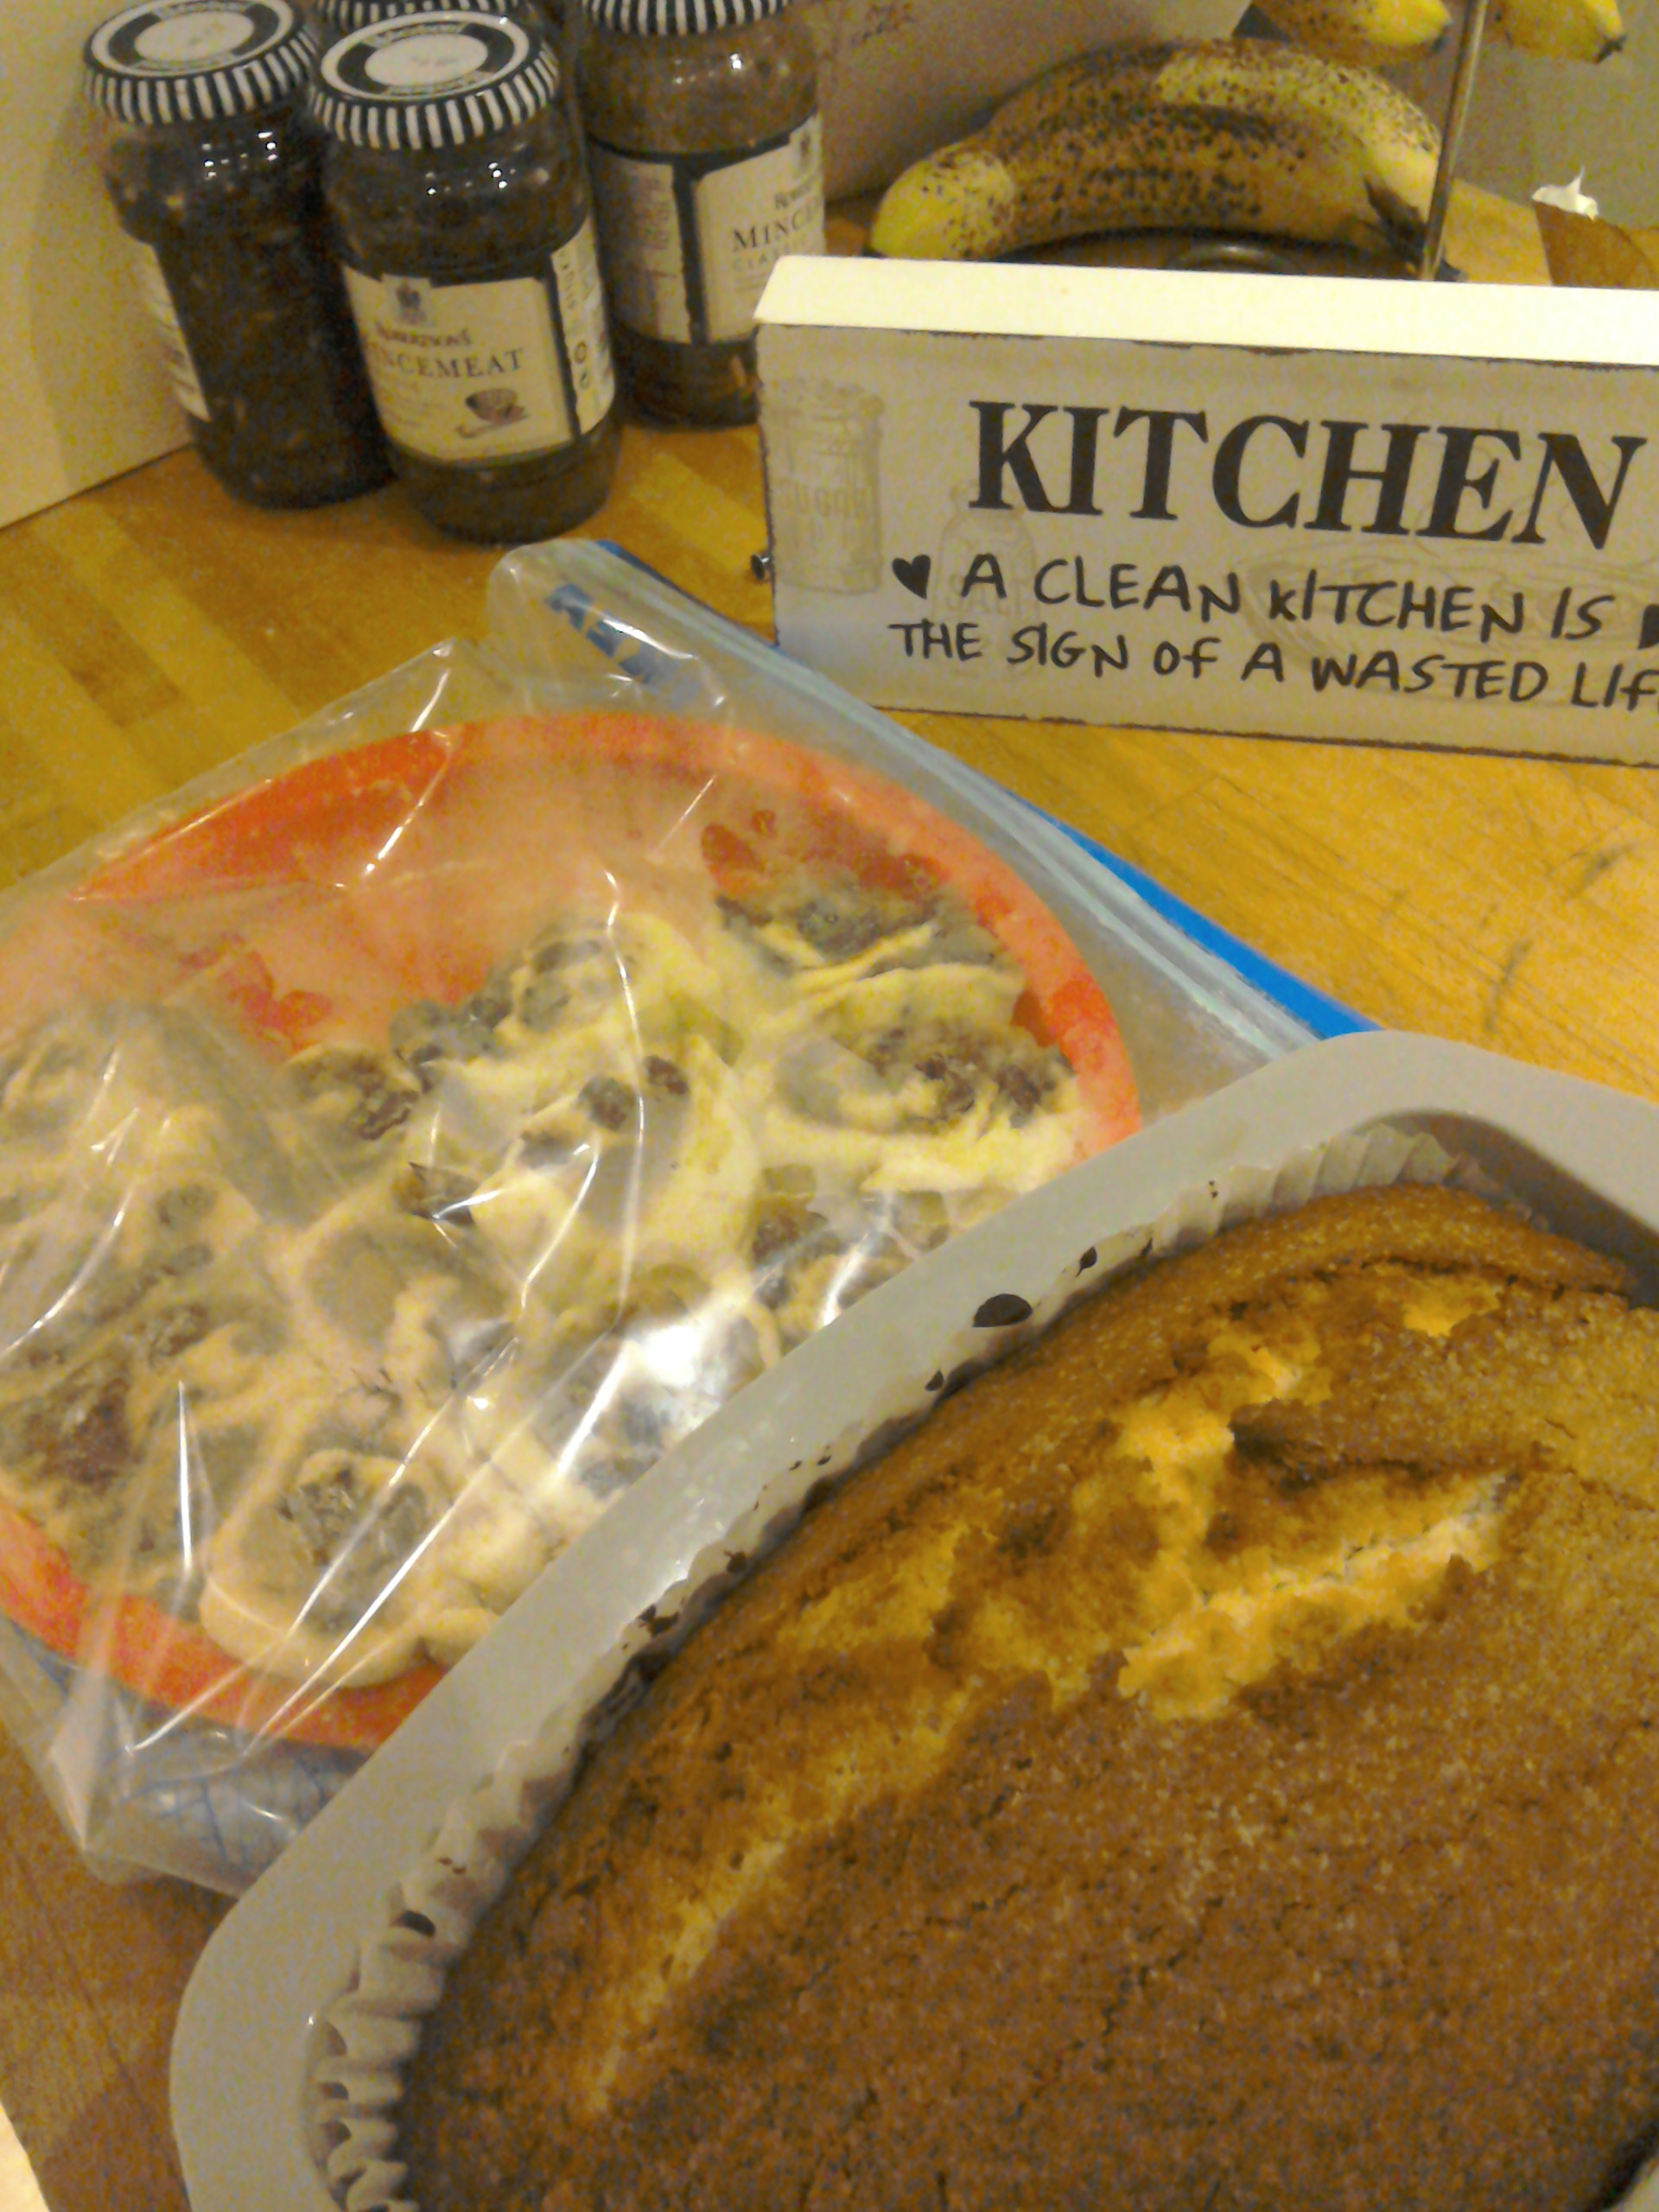
Didn’t get time to write a proper blog post this evening. Sorry. I was baking for our weekly community coffee morning, Cake and Chat. And watching Midsomer Murders. The Vicar didn’t do it this week.

Jpeg

Madeira Cake, Chelsea buns proving and splendid new kitchen sign from Father Christmas


Read Full Post »

It’s not all cake in the Vicarage. There’s bread too. Last week I made my first couple of loaves of sourdough.

I’ve been making my own bread on and off ever since we lived in Singapore and the only bread to buy was either ridiculously sweet chewy sliced rubber stuff or tastier but eyewateringly expensive. I started with a bread machine that broke from overuse and since then I’ve generally used my Kenwood mixer to make the dough. I very often make dough for pizza at home or for breadsticks for our weekly Cake and Chat community coffee morning. Although, after watching The Great British Bakeoff the other week, I think I may be making the sticks all wrong – they’re doughy rather than snappy. Still tasty though. I hardly ever make a proper loaf.

I’ve been thinking about sourdough for a while. It’s the bread of geeks, as you’ll see if you google it, made without any added yeast but a starter made from flour and water which is left to brew its natural yeasts. And then I was reading the side of my flour bag (I suffer from acute narrative hunger and need to read everything – one reason why the internet is so bad for me) and there it was – a sourdough starter recipe. So I consulted Annalise Barbieri’s lovely blog because I knew she made sourdough and also some recipes I found online. And then I gave it a go.

The flour and water concoction magically became my starter over the course of a week and a very sticky dough became my first loaf.  Although it spread out rather alarmingly, it came out of the oven with a lovely crust and proper airy texture. The second loaf was less airy but less spread too. I’m finding it a fun way to make bread, especially since the recipe I’m using doesn’t involve much kneading, just a brief punch a few times over the course of a morning. It also keeps really well, although there’s not much been kept. Sourdough has a low GI and is easier to digest than bread made with added yeast. And a loaf cost less than 50p to make. Brilliant.

A couple of days after starting my starter, I discovered that it’s Sourdough September. So I seem to have timed it quite well. Anyway, I’ve just pulled a new loaf out of the oven and I’m going to call a friend now and invite her over for coffee and a slice of bread.

This slideshow requires JavaScript.

Read Full Post »

Fridge cake aka tiffin is a very useful no-bake Vicarage staple. It uses store cupboard ingredients and can be made quickly, although it needs a few hours to set in your fridge – if you’re overeager to consume it, it can be rather too crumbly and sticky.

Ingredients

  • 400g digestive biscuits (I use the cheapo range), broken into crumbs – in a plastic bag using a rolling pin, or in a food processor
  • 200g butter (hard marg would work too but not soft)
  • 4 heaped tbspns cocoa powder
  • 3 tbspns golden syrup
  • 3 tbspns brown sugar
  • 4 handfuls sultanas/raisins/cranberries or other dried fruit as you like (approx 100-150g in total weight)
  • 200-400g white chocolate, melted

Place the butter, cocoa powder, golden syrup, sugar and dried fruit in a large microwaveable bowl with lid and heat on full power for 2-3 minutes. If you don’t have a microwave, you can do this over a low heat in a saucepan. Once the butter has melted and the sugar has dissolved, add the crushed biscuits and mix thoroughly.

Place the mixture in a small roasting tin (about 20cmx30cm) that has been lined with cling film and level it out into the corners. Cling film is the best way to avoid sticking AND excessive washing up. Place the tin in the fridge whilst you melt the chocolate topping.

I usually use 200g white chocolate for the topping for this, but it is a little skimpy – 400g would give you a really good layer on top. I melt the chocolate in a jug on defrost in the microwave, but also sometimes use the old method of a bowl on top of a pan of boiling water. Usually when the last lot of chocolate was burnt in the microwave, alas. Using a knife, spread the chocolate over the now slightly cooled base and then refrigerate the lot for a couple of hours – preferably overnight. Use a sharp knife to cut it into pieces to serve with strong coffee.

Read Full Post »

Here’s my take on Anzac biscuits – a fast and fabulous recipe which produces a great mound of tasty coconut and oat treats. I can produce about 40 in a single batch and they are extremely popular with all ages. They are also egg-free, so good for vegans or Asian vegetarians.

Ingredients

  • 3oz/75g porridge oats
  • 3oz/75g desiccated coconut
  • 4oz/100g plain flour
  • 4oz/100g sugar
  • 40z/100g butter or marg (soft is fine)
  • 1tbspn golden syrup
  • 1tspn bicarbonate of soda, dissolved in 2 tbspn hot water

Mix the dry ingredients in a large bowl. Meanwhile, melt the marg and golden syrup in a jug in the microwave, or a pan on the stove if you prefer. Add the bicarb to the hot water in a small cup or dish and then stir the fizzy mix into the warm marg/syrup combo. Then add the warm wet ingredients to the dry ones and stir in carefully.

For smallish Hobnob size biscuits use teaspoons of mixture – I can fit 16 on a standard baking sheet (covered with silicone lining), leaving room for spreading. Bake at about 180ºC (Gas Mark 4) for 8-12 minutes until the biscuits are golden all over and most have flattened out after rising. Transfer to a rack for cooling after they’ve had a few minutes to firm up.

The gallery below shows some slightly larger ones made using dessertspoonfuls of the mixture which gives you about 24 biscuits from a single batch.

This slideshow requires JavaScript.

Read Full Post »

Last week I had to bake for Cake & Chat and wanted something a little different. I also had a packet of rhubarb that I’d picked up on the reduced section at our local Morrison’s. And so here is a recipe for rhubarb pudding cake (I found the original online at a National Trust historic cakes site).

It went wonderfully with creme fraiche on Thursday and with cream on Sunday. I had to bake a second one this weekend as the first one had disappeared before lunch on Thursday. The leftovers are in the fridge tempting me now.

The recipe involves three separate sections – a cake batter, chopped and sugared rhubarb and a crumble topping. Althought it’s slightly faffier than a bog standard sponge, it’s worth the extra trouble for a delicious dessert cake. The one in the pictures has some gooseberries in it aswell as I didn’t have quite enough rhubarb second time round – they worked very well.

Ingredients

  • 1lb rhubarb (or gooseberries, or mix of both), chopped into 1″ pieces and sprinkled with 1-2tbspns brown sugar

Crumble topping

  • 2oz butter
  • 3oz plain flour
  • 1oz caster sugar

Cake batter

  • 3oz soft marg or butter
  • 3oz caster sugar
  • 2 eggs
  • 3oz self raising flour
  • 1 tbspn milk

Firstly, prepare the rhubarb, chopping it into chunks, or top and tail your gooseberries. Place it in a bowl and sprinkle the brown sugar over the fruit and set aside. Then make the crumble topping, chopping the butter into the flour and rubbing it into small crumbs with your fingers. Then stir in the sugar and set aside. Finally, in another bowl, cream together the butter and the sugar, beat in the eggs and fold in the flour. I do this using an electric hand mixer – there’s not enough mix for my freestanding mixer. Add enough milk to give a dropping consistency – if you’re using large eggs you might not even need the milk.

You’ll need an 8″ cake tin, lined with baking paper (or a reusable liner). Then you layer the cake up – first the batter, then the fruit (with another sprinkling of brown sugar) and finally the crumble topping mix. Bake at 190ºC (Gas 5, Fan 180ºC) for 40-45 minutes until the cake feels firm on top.

This cake is delicious hot or cold and best served with some sort of cream. It would be good with custard too.

Read Full Post »

The Vicar and I were married at St Andrew the Great in Cambridge. I’d been a member of the church for about eight years when we wed. The year before that the congregation had moved from the Round Church, a beautiful Norman building which had become far too small for the church to meet in. The move cost the church (as I recall) £1.8 million, as the new (to us) building needed extensive refurbishment, having been redundant for 25 years. The congregation gave generously, but there were a few more traditional fundraising efforts. One of these was a Round Church cookbook.

A recipe from the cookbook that I still use regularly is Rosemary Sennit’s malt loaf. It’s great for batch baking – I normally make three loaves at once and quick to put together. It’s egg free and therefore suitable for Asian Vegetarians & Vegans.  It’s low fat aswell and I now prefer it to the Soreen option – it’s less strong and squidgy, but still delicious with butter. All brilliant reasons to use this simple and tasty recipe.

Ingredients

  • 12oz self raising flour (1lb 8oz for double batch – you can double all the other ingredients easily yourself!)
  • 1/2 tspn salt
  • 2oz sugar
  • 4oz raisins/sultanas or mix of them
  • 2 tbspn malt extract (buy it in a health food shop eg Holland and Barrett)
  • 1 tbspn black treacle
  • 1/2 pt milk

Put the flour and salt in a bowl, adding the sugar and dried fruit and mixing together. Put the malt, treacle and milk into microwave jug. I heat it for 1-2 minutes on maximum heat and then mix it together. You can also do this in a pan over a low heat on the stove. Then pour the liquid into the dry ingredients & mix thoroughly. Pour everything into a well buttered 3lb loaf tin, or one lined with a reusable liner. Or if you double the batch you can make three smaller loaves in 2lb tins – this is what I normally do. Don’t use a paper liner as these will stick (I speak from traumatic experience).

Bake at 180ºC (Gas 4, Fan 170ºC) for 40-45mins or so until firm to touch, and a skewer comes out clean. I’ve found that the cooking time is about the same for both sizes of loaf. The original recipe said to cook a single quantity in a 2lb loaf tin in 75mins, so if you only have that tin size your deeper loaf will take longer – you might want to cover up towards the end of cooking to prevent the dried fruit from burning, though. Turn out and cool on a rack, or you can leave to cool in the tin. Slice and eat with butter (or low fat marg for the health conscious).

Read Full Post »

This is a brilliantly quick and easy cookie recipe given to me by Mrs Rev Ted, whose husband was the Vicar’s boss when he did his curacy. So she was my training incumbent, and this recipe was an essential part of my vicar’s wife training. It’s speedy, just like Failsafe Flapjack and is also flexible so you can fill them with whatever you have to hand – chocolate chips, raisins, cranberries etc.

Ingredients

  • 3oz butter or margarine (soft is fine)
  • 3oz soft brown sugar (or caster sugar if you don’t have brown)
  • 3oz demerera sugar (or granulated)
  • 1/2 tspn vanilla extract
  • 1 egg
  • 6oz self raising flour (or 5oz self raising flour, 1oz cocoa, 1/4 tspn baking powder)
  • 4oz chocolate chips, raisins, cranberries, or whatever you fancy

Cream the butter and sugars, then beat in the vanilla extract and egg. Finally add the flour (or flour, cocoa powder and baking powder for chocolate cookies) and your chocolate chips or raisins.

To bake them I line 3 baking trays with reusable silicone liners (you can use baking paper or grease your trays well) and use two teaspoons to make walnut-sized blobs of mixture. I can make about 40 standard biscuit-sized cookies from a single batch of this mixture. Bake them for 12-15 minutes at 180ºC (Gas 4, Fan 170ºC), until they have turned golden (you can only see this when they don’t have cocoa in them!) and have risen. They will flatten out again and harden a little whilst cooling – wait a few moments before transferring to cooling racks with a palette knife. If you slightly undercook them you can get a chewy cookie texture, or leave a little longer for a crunchier bite.

Options I have tried successfully for these cookies include double choc chip (cocoa in the mix with white choc chips) and cranberry and choc chip with a plain mix.

Double Choc Chip Can Do Cookies

Read Full Post »

I can start with 4 ingredients in the cupboard and have 2 trays of flapjacks ready and out of the oven in less than half an hour. This is a delicious flapjack recipe – my absolute favourite, with a chewy texture and a delicious caramel taste. It’s my go-to recipe for home-made treats in a hurry. I was originally given the recipe by another ordinand’s wife when the Vicar was training for ministry and I must have baked these flapjacks at least 100 times since then without a bad batch. I usually make a double batch as it only takes a couple of minutes more than a single batch and there never seems to be any trouble in disposing of them.

Ingredients

  • 150g granulated sugar
  • 150g soft margarine
  • 4 tbspns golden syrup
  • 250g porridge oats

Melt the sugar, margarine and golden syrup together in a large microwave bowl (or in a saucepan on the stove if you don’t have a microwave) – it takes about 2 minutes on full power in my cheapo 750W microwave. To get the golden syrup out of my measuring spoon easily I dip the spoon (a metal one) in a mug of just boiled water before adding each spoonful. Once the sugar, marg and syrup have melted together, mix in the oats. Then pop the mix in a 8″x12″ baking tin, lined with silicone baking paper (or a reusable liner like I use), and flatten it down so that it’s evenly distributed and pop it in the oven.

Your oven needs to be pre-heated to 180ºC (Gas 4, Fan 170ºC). In my fan oven, the flapjack takes 15 minutes to cook, but can take 20-30mins if your oven isn’t as speedy or isn’t quite up to temperature at the beginning. Once it’s golden on top, remove from the oven and leave in the tin for five minutes before cutting into slices sized to your flapjack appetite (generally 21-24 in my experience) and leaving to cool fully in the tin. If you cook it a little longer, it’ll be crunchy rather than chewy, so you can cook differently according to your flapjack preference.

Read Full Post »

Older Posts »